


-
Recipe by
-
Prep time18 hours, including rest time
-
Cook Time45 minutes
-
Yield1 Large Loaf
Equipment: Classic Dutch Oven
Ingredients
600 grams (5 cups) bread flour
450 grams (a scant 2 cups) room temperature water
12 grams (1 tablespoon kosher) salt
2.5 grams (1 teaspoon) instant yeast
Preparation
In a large container (preferably one with clear sides, such as a plastic bucket or glass bowl), mix together the flour and water until few dry spots remain. The dough will be shaggy and stiff. Cover and allow to rest for 30 minutes.
Remove the cover and sprinkle the yeast and salt over the dough. Wet your hands, then use your fingers to “poke” the yeast and salt down into the dough. Perform a set of stretch-and-folds: with wet hands, take one side of the dough, stretch the dough up, then fold it into the center of the container. Turn the container ¼ turn, then repeat on all sides, for a total of 4 folds. Repeat this step two more times, for a total of 3 sets of “pokes” and 3 sets of folds.
Cover the dough and allow it to rise at room temperature for 2-3 hours, until just about doubled in size. Then transfer the dough to the refrigerator and allow to rest overnight, at least 8 hours and up to 24. The dough will rise a bit more, but cold temperatures dramatically slow this down - 18 hours is a nice sweet spot!
The next day, remove the dough from the fridge and turn it onto a lightly floured surface, punching down any very large air pockets. Repeating the same motion as the stretch and fold, pre-shape the dough by tucking all four sides into the center and forming a ball. Place the ball seam-side down on the lightly floured surface, cover with a damp, lint-free towel, and allow to rest for 30 minutes.
Using a bench scraper (or just your hands), shape the ball of dough into a tight-skinned ball by scooching and rotating the ball around on your work surface. Do not add additional flour here - friction is your friend for achieving a tight shape. Place the shaped ball, seam side up, in a proofing basket or a colander lined with a lint-free tea towel that has been dusted heavily with flour. Allow to rise for an additional 1-3 hours, until puffy and visibly full of air.
About one hour before you bake, when the dough is not quite fully risen yet, preheat your Milo Dutch Oven in your oven, with the lid on, to 500°F (260℃). The full hour preheating process is essential for good oven-spring, the last bit of rise.
When the loaf is fully proofed, place an 8 ¼ by 11 ¼ sheet of Kana Parchment Paper over the basket or colander, then flip the loaf (now seam-side down) onto the paper. Dust off any excess flour, if desired.
Using a lame, razor blade, or very sharp knife, make a slash ½ inch deep down the center of the loaf. Pro tip: wet the blade before cutting to prevent dragging, and move quickly and confidently in your slash. Remove the Milo Dutch Oven from the oven, and carefully remove the lid. Using the parchment paper as a sling, place the loaf into the Dutch oven and cover. Bake at 500°F (260℃) for 20 minutes.
After 20 minutes, remove the lid, drop the oven temperature to 475°F (240℃), and continue to bake the loaf for an additional 20-25 minutes, until the crust is dark brown and the interior of the loaf reads at least 205°F.
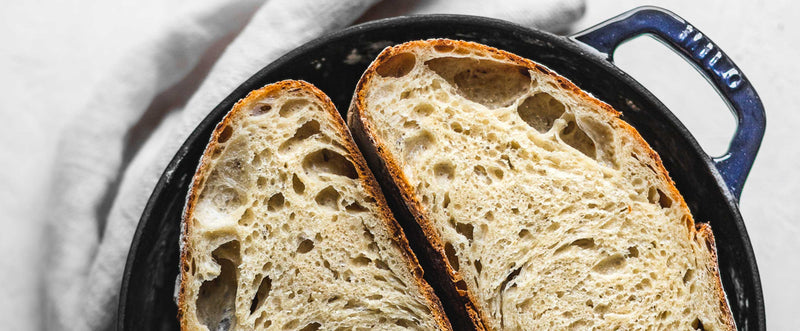
Remove the loaf from the Dutch oven and cool completely before cutting. You may hear the loaf crackling or “singing” as it cools, which is a sign of good fermentation and baking.


